
目录
开发 Vue 的两种方式
一、传统模式
核心包传统开发模式:基于 html / css / js 文件,直接引入核心包,开发 Vue。
<body>
    <div id="app">
        <h1 class="title"></h1>
        <div @click="title = '修改后的标题'">点击修改标题</div>
    </div>

    <script src="https://cdn.jsdelivr.net/npm/vue@2/dist/vue.js"></script>
    <script>
        const app = new Vue({
            el: '#app',
            data: {
                title: '标题'
            }
        })
    </script>
</body>
二、工程化开发模式
基于构建工具(例如:webpack ) 的环境中开发 Vue。
1、什么是脚手架?
工程化开发面临的问题:webpack配置不简单、雷同的基础配置、缺乏统一标准
Vue CLI 是 Vue 官方提供的一个全局命令工具(脚手架工具)。
可以帮助我们快速创建一个开发 Vue 项目的标准化基础架子。【集成了 webpack 配置:babel less es】
这个搭建好的标准化的架子就是脚手架。
babel, less, es6(浏览器不支持) ————> webpack配置(打包) ————> js(es3, es5), css(浏览器支持)
xy:脚手架帮助我们创建一个集成了打包工具的标准化项目
2、脚手架的安装
安装脚手架工具:npm i @vue/cli -g
查看 Vue 版本:vue --version
创建项目架子:vue create projectName(项目名-不能用中文)
启动项目: npm run serve(找package.json)
运行npm run serve时报错。错误如下Error: The project seems to require yarn but it’s not installed.
清除yarn.lock 文件 重新 npm install 和 npm run serve
3、项目的目录结构
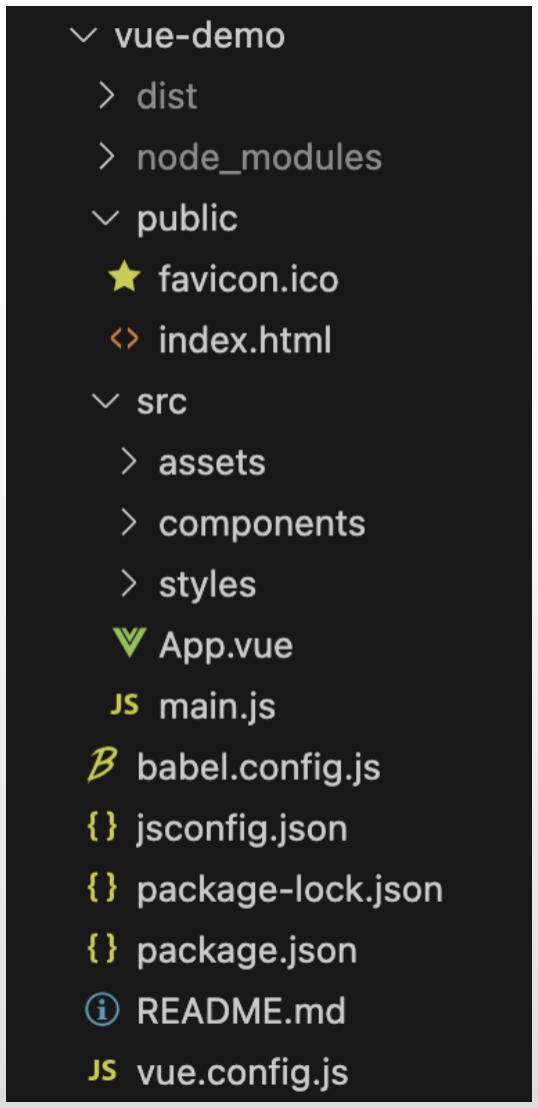
文件:
src/main.js: 默认的入口文件
src/App.vue:根组件
public/index.html:默认的模板文件
Vue文件
一、三个部分:结构、行为、样式
// 结构
<template>
  <div class="search-box">
     <button @click="goSearch">搜索一下</button>
  </div>
</template>


// 行为
<script>
export default {
  name: 'FindMusic',
  // data是一个方法
  data() {
    return {
      inpValue: '搜索一下'
    }
  },
  methods: {
    goSearch() { }
  }
}
</script>


// 样式
<style>
.search-box {
  display: flex;
  justify-content: center;
}

.search-box button {
  width: 100px;
  height: 36px;
  border: none;
  background-color: #ad2a26;
  color: #fff;
  position: relative;
  left: -2px;
  border-radius: 0 4px 4px 0;
}
</style>
二、组件:根组件、全局组件、普通组件
1、根组件
src/App.vue 就是根组件,整个应用最上层组件,包裹其它组件
2、全局组件
在main.js中注册
import Vue from 'vue'
import BaseGoodsItem from './components/BaseGoodsItem'
Vue.component('BaseGoodsItem', BaseGoodsItem)
3、普通组件
在其它组件内注册
<template>
  <div class="App">
    <XtxShortCut></XtxShortCut>
  </div>
</template>

<script>
import XtxShortCut from './components/XtxShortCut.vue'
export default {
  data () {
    return {
      count: 0
    }
  },

  // 注册局部组件
  components: {
    XtxShortCut,
  }
}
</script>
三、生命周期
export default {
    data () {
        return {
            title: '标题'
        }
    },

    // 创建阶段:创建响应式数据
    beforeCreate() {
        // beforeCreate 响应式数据准备好之前 undefined
        console.log('beforeCreate 响应式数据准备好之前', this.title)
    },
    created() {
        // created 响应式数据准备好之后 标题
        console.log('created 响应式数据准备好之后', this.title)
    },

    // 挂载阶段:渲染模版
    beforeMount() {
        // beforeMount 模板渲染之前
        console.log('beforeMount 模板渲染之前', document.querySelector('.title').innerHTML)
    },
    mounted() {
        // mounted 模板渲染之后 标题
        console.log('mounted 模板渲染之后', document.querySelector('.title').innerHTML)
        document.querySelector('.focus-test').focus()
    },

    // 更新阶段:修改数据,更新视图
    beforeUpdate() {
        console.log('beforeUpdate 数据修改了,视图还没更新', document.querySelector('.title').innerHTML)
    },
    updated() {
        console.log('updated 数据修改了,视图已经更新', document.querySelector('.title').innerHTML)
    },

    // 销毁阶段:销毁实例,在控制台输入:app.$destroy(); 模拟销毁流程
    beforeDestroy() {
        console.log('beforeDestroy, 卸载前')
        console.log('清除掉一些Vue以外的资源占用,定时器,延时器...')
    },
    destroyed() {
        console.log('destroyed,卸载后')
    }
}
四、其它
export default {
    // 数据
    data () {
        return {
            title:'大标题',
            message: 'Hello, Vue.js',
            obj:{
                words:''
            }
        }
    },
    // 属性
    props:['userName'],
    // 计算属性:本质就是方法
    computed: {
        upMessage:function () {
            // 在这里编写计算逻辑
            return this.message.toUpperCase();
        }
    },
    methods:{
        editFn () {}
    },
    watch: {
        title(newValue) {
            console.log('变化了', newValue)
        },
        'obj.words'(newValue) {
            console.log('变化了', newValue)
        },
        obj: {
            deep:true,//深度监视
            immediate:true,//立即执行,一进入页面handler就立刻执行一次
            handler(newValue) {}
        },
        components:{
            XtxBanner
        }
    }
}
Vue中的指令
一、常用指令
v-bind 动态的设置html的标签属性(src, title, url等)v-bind:src=”url” ,可以简写为 :src=”url”
<img :src='url'>
v-for 基于数据循环, 多次渲染整个元素 v-for=”(item, index) in booksList” :key=”item.id” 不要把key漏掉
<ul>
    <li v-for="(item, index) in list" :key="item.id"></li>
</ul>
v-model 可以让数据和视图,形成双向数据绑定
<input type="text" v-model="inputText">
v-on:click=”count++” 内联语句、 v-on:click=”fn” 配置函数、 @click=”fn” 简写、 @click=”fn(param)” 参数传递
<button v-on:click="count++">+</button>
<button v-on:click="fn(param)">+</button>
<button @click="fn(param)">+</button>
v-if 底层原理:根据 判断条件 控制元素的 创建 和 移除(条件渲染)v-else-if v-else
如果是false不会渲染
<p v-if="score >= 90">成绩评定A:奖励电脑一台</p>
<p v-else-if="score >= 70">成绩评定B:奖励周末郊游</p>
<p v-else-if="score >= 60">成绩评定C:奖励零食礼包</p>
<p v-else>成绩评定D:惩罚一周不能玩手机</p>
v-show 底层原理:切换 css 的 display: none 来控制显示隐藏
ture和false都会渲染,需要频繁控制显隐的场景使用,开销较小
<div v-show="flag" class="box">我是v-show控制的盒子</div>
二、自定义指令
1、局部注册
<template>
    <div class="box2" v-loading="isLoading"></div>
</template>

export default {
    directives: {
        loading: {
            // 标签插入文档时调用:el是标签,binding是传递的数据
            inserted (el, binding) {
                binding.value ? el.classList.add('loading') : el.classList.remove('loading')
            },
            // 更新时调用:比如isLoading的值变化了
            update (el, binding) {
                binding.value ? el.classList.add('loading') : el.classList.remove('loading')
            }
        }
    }
}

<style>
.loading:before {
  content: '';
  position: absolute;
  left: 0;
  top: 0;
  width: 100%;
  height: 100%;
  background: #fff url('./loading.gif') no-repeat center;
}
</style>
2、全局注册
在main.js中
Vue.directive('focus', {
  // 指令所在的dom元素,被插入到页面中时触发
  inserted (el) {

    //el 就是指令所绑定的元素
    el.focus()
  }
})


// 在其他模板中使用
<input v-focus ref="inp" type="text">
父子组件通信
一、单向数据流
1、子组件
数据:父传子
通过属性把数据传递给子组件比如:title=’myTitle’
prop 的数据是外部的 → 不能直接改,要遵循 单向数据流
在组件内部修改props会报错:Unexpected mutation of “title” prop
属性还可以添加校验规则
数据:子传父
通过方法向父组件传递数据比如:this.$emit('changTitle','传智教育')
<template>
  <div class="son" style="border: 3px solid #000; margin: 10px">
    我是Son组件
    <button @click="changeFn">修改title</button>
  </div>
</template>

<script>
export default {
  name: 'Son-Child',
  props: ['title'],
  methods: {
    changeFn() {
      // 通过this.$emit() 向父组件发送通知
      this.$emit('changTitle','传智教育')
    },
  },
}
</script>
2、父组件
<template>
  <div class="app" style="border: 3px solid #000; margin: 10px">
    我是APP组件
    <!-- 2.父组件对子组件的消息进行监听 -->
    <Son :title="myTitle" @changTitle="handleChange"></Son>
  </div>
</template>

<script>
import Son from './components/Son.vue'
export default {
  name: 'App',
  data() {
    return {
      myTitle: '学前端,就来黑马程序员',
    }
  },
  components: {
    Son,
  },
  methods: {
    // 3.提供处理函数,提供逻辑
    handleChange(newTitle) {
      this.myTitle = newTitle
    },
  },
}
</script>

<style>
</style>
二、事件总线
1、创建一个文件
EventBus.js
import Vue from 'vue'
const Bus  =  new Vue()
export default Bus
2、传递数据 可以在任何地方发送
<script>
import Bus from '../utils/EventBus'
export default {
  methods: {
    sendMsgFn() {
      Bus.$emit('sendMsg', '今天天气不错,适合旅游')
    },
  },
}
</script>
3、接收数据
可以在任何地方接收
<script>
import Bus from '../utils/EventBus'
export default {
  data() {
    return {
      msg: '',
    }
  },
  created() {
    Bus.$on('sendMsg', (msg) => {
      this.msg = msg
    })
  },
}
</script>
三、爷-父-子 provide 和 inject
爷爷组件
export default {
  provide() {
    return {
      // 简单类型 是非响应式的
      color: this.color,
      // 复杂类型 是响应式的
      userInfo: this.userInfo,
    }
  }
}
子组件(包括父组件或者孙子组件)
<template>
  <div class="grandSon">
    我是GrandSon
     - -
  </div>
</template>

export default {
  inject: ['color', 'userInfo'],
}
双向绑定
一、v-model原理
<!-- v-model的底层其实就是:value 和 @input的简写 -->
<!-- input内部:props:['value'] this.$emit('input','事件对象') -->
<!-- 此处$event取到的参数是事件对象,所以通过 $event.target.value 拿到新值-->
<input type="text" v-model="msg2"/>
<input type="text" :value="msg2" @input="msg2 = $event.target.value" />
注意:$event 用于在模板中,获取事件的形参
二、自定义组件使用v-model
<div class="app">
<!-- 自定义组件使用v-model -->
<!-- BaseSelect内部:props:['value'] this.$emit('input','newValue') -->
<!-- $event 取到的是传递出来的参数 newValue -->
<BaseSelect :value="selectId" @input="selectId = $event"></BaseSelect>
<BaseSelect v-model="selectId"></BaseSelect>
</div>
为什么此处是$event,而不是像input一样的$event.target.value?
xy:我的理解是系统组件会根据需要进行绑定和解析,比如input是value相关,单选和复选v-model 会绑定 checked 属性
绑定的属性会根据需要进行变更,那么传递出来的参数也会根据需要进行调整。
自定义的组件会直接绑定传递出来的参数
<template>
  <div>
    <select :value="value" @change="selectCity">
      <option value="101">北京</option>
      <option value="102">上海</option>
      <option value="103">广州</option>
      <option value="104">深圳</option>
    </select>
  </div>
</template>

<script>
export default {
  props: {
    value: String,
  },
  methods: {
    selectCity(e) {
      this.$emit('input', e.target.value)
    },
  },
}
</script>
三、自定义组件使用自定义名称
如果不想使用固定的v-model 和 value,想使用自定义的名称,可以使用sync
<BaseDialog :isShow="isShow" @update:isShow="isShow=$event"></BaseDialog>
<BaseDialog :isShow.sync="isShow"></BaseDialog>
BaseDialog组件内部
export default {
  props: {
    isShow: Boolean,
  },
  methods:{
    closeDialog(){
      this.$emit('update:isShow',false)
    }
  }
}
插槽slot
一、默认插槽
<template>
  <div class="dialog">
    <!-- 默认插槽定义:默认插槽只能有一个定制位置 -->
    <slot>我是默认内容</slot>
  </div>
</template>
默认插槽使用:只能有一个定制位置
<MyDialog>要显示的内容</MyDialog>
<MyDialog>
    <div>要显示的内容</div>
</MyDialog>
二、具名插槽
<template>
  <div class="dialog">
    <!-- 具名插槽定义 -->
    <!-- 一但插槽起了名字,就是具名插槽,只支持定向分发 -->
    <slot name="head"></slot>
  </div>
</template>
具名插槽使用
<MyDialog>
    <!-- 需要通过template标签包裹需要分发的结构,包成一个整体 -->
    <!-- v-slot:可以使用#号替换 -->
    <template v-slot:head>
        <div>我是大标题</div>
    </template>
</MyDialog>
三、作用域插槽
<template>
  <div class="dialog">
    <!-- 作用域插槽定义 -->
    <!-- 作用域插槽是内部向外部传递数据 -->
    <!-- 传递的格式:{"xm":"xiaoming","age":"18"} -->
    <slot name="head" xm="xiaoming" age="18"></slot>
  </div>
</template>
作用域插槽使用
<MyDialog>
    <!-- 需要通过template标签包裹需要分发的结构,包成一个整体 -->
    <!-- 如果是没有名字的默认插槽:#default="obj" -->
    <template #head="obj">
        <div> \{\{ obj.xm \}\}</div>
        <div>\{\{ obj.age \}\}</div>
    </template>
</MyDialog>
vue-router
路由:路由是一种映射关系
Vue中的路由:路径 和 组件 的映射关系,根据路由就能知道不同路径的,应该匹配渲染哪个组件
lxy:路由就是路径和页面的映射关系
一、引入vue-router包
vue2使用的vue-router是3.x版本
 "dependencies": {
    "axios": "^1.3.3",
    "core-js": "^3.8.3",
    "less": "^4.1.3",
    "less-loader": "^11.1.0",
    "vue": "^2.6.14",
    "vue-router": "3.6.5"
  },
二、main.js挂载
import Vue from 'vue'
import App from './App.vue'
import router from './router/index'
Vue.config.productionTip = false
new Vue({
  render: h => h(App),
  router
}).$mount('#app')
三、设置路由出口
<template>
  <div id="app">
    <div class="link">
      <router-link to="/home">首页</router-link>
      <router-link to="/search">搜索页</router-link>
    </div>
    <router-view></router-view>
  </div>
</template>
四、编辑路由
在单独的文件中router/index.js编辑路由
import Home from '@/views/Home'
import Search from '@/views/Search'
import NotFound from '@/views/NotFound'
import Vue from 'vue'
import VueRouter from 'vue-router'
Vue.use(VueRouter) // VueRouter插件初始化
// 创建了一个路由对象
const router = new VueRouter({
  // 注意:一旦采用了 history 模式,地址栏就没有 #,需要后台配置访问规则
  // mode: 'history',
  routes: [
    { path: '/', redirect: '/home' },
    { path: '/home', component: Home },
    { name: 'search', path: '/search/:words?', component: Search },
    { path: '*', component: NotFound }
  ]
})
export default router
五、路由的跳转传参
1、编程式导航
this.$router.push('/search')
this.$router.push('search')
2、查询参数传参
// 查询参数传参
// http://localhost:8080/#/search?key=aa
this.$router.push('/search?key=aa}')

//完整写法
this.$router.push({
    path: '/search',
    query: { key: 'aa', key1: 'bb' }
})

// 取参数
this.$route.query.key //aa
3、动态路由传参
// 动态路由传参
// http://localhost:8080/#/search/aa
this.$router.push('/search/aa')
// 完整写法
this.$router.push({
name: 'search',
query: { key: 'aa' },
params: { words: 'aa', value: 'bb' }
})
// 取参数
this.$route.params.words //aa
六、一级路由、二级路由
如何区分一级路由和二级路由?
的使用
vuex
一、引包
vue2使用的是vuex3.x
"dependencies": {
"core-js": "^3.8.3",
"vue": "^2.6.14",
"vuex": "3"
},
二、main.js挂载
import Vue from 'vue'
import App from './App.vue'
import store from './store'

new Vue({
  store,
  render: h => h(App)
}).$mount('#app')
三、定义store
在src/store/index.js文件内定义store
// 这里面存放的就是 vuex 相关的核心代码
import Vue from 'vue'
import Vuex from 'vuex'
import user from './modules/user'
import setting from './modules/setting'

// 插件安装
Vue.use(Vuex)

// 1. 通过 state 可以提供数据 (所有组件共享的数据)
const state = {
  title: '仓库大标题',
  count: 100,
  list: [1, 2, 3, 4, 5, 6, 7, 8, 9, 10]
}
// 获取数据
// this.$store.state.count

// 2. 通过 mutations 可以提供修改数据的方法
const mutations = {
  // 所有mutation函数,第一个参数,都是 state
  // 注意点:mutation参数有且只能有一个,如果需要多个参数,包装成一个对象
  addCount(state, obj) {
    console.log(obj)
    // 修改数据
    state.count += obj.count
  },
  subCount(state, n) {
    state.count -= n
  },
  changeCount(state, newCount) {
    state.count = newCount
  },
  changeTitle(state, newTitle) {
    state.title = newTitle
  }
}
// 提交mutation,调用mutation函数
// this.$store.commit('changeCount', num)


// 3. actions 处理异步
// 注意:不能直接操作 state,操作 state,还是需要 commit mutation
const actions = {
  // context 上下文 (此处未分模块,可以当成store仓库)
  // context.commit('mutation名字', 额外参数)
  changeCountAction(context, num) {
    // 这里是setTimeout模拟异步,以后大部分场景是发请求
    setTimeout(() => {
      context.commit('changeCount', num)
    }, 1000)
  }
}
// 使用
// this.$store.dispatch('changeCountAction', 100)

// 4. getters 类似于计算属性
const getters = {
  // 注意点:
  // 1. 形参第一个参数,就是state
  // 2. 必须有返回值,返回值就是getters的值
  filterList(state) {
    return state.list.filter(item => item > 5)
  }
}
// 使用
// this.$store.getters.filterList

// 5. modules 模块
const modules = {
  user,
  setting
}

// 创建仓库
const store = new Vuex.Store({
  // 严格模式 (有利于初学者,检测不规范的代码 => 上线时需要关闭)
  strict: true,
  state,
  mutations,
  actions,
  getters,
  modules
})

// 导出给main.js使用
export default store
四、使用
1、直接使用
// 获取数据
this.$store.state.count

// 修改数据:提交mutation,调用mutation函数
this.$store.commit('changeCount', num)

// 异步修改数据:100是传递的参数
this.$store.dispatch('changeCountAction', 100)

// 派生方法:类似计算属性
this.$store.getters.filterList


// 如果是调用子模块
this.$store.dispatch('user/setUser', newUserInfo)
2、通过辅助函数使用
import { mapState } from 'vuex'

export default {
    computed: {
        // mapState 和 mapGetters 都是映射属性
        ...mapState(['count', 'title'])
        ...mapGetters(['filterList']),
    },
    methods: {
        // mapMutations 和 mapActions 都是映射方法
        // 全局级别的映射
        ...mapMutations(['subCount', 'changeTitle']),
        ...mapActions(['changeCountAction']),

        // 模块的映射
        ...mapMutations('user', ['setUser']),
    }
}
行者常至,为者常成!